
ELEGOO 0.96 Inch OLED Display Screen Module
4.6Editor score
Self-luminous pixels
Three modules included
Fixed color zones
Discover the best Arduino LCD display options for your projects. This guide compares top-rated modules including OLED, TFT, and I2C screens for makers and
Choosing the right display for your embedded projects can transform a basic circuit into an interactive device. Whether you need simple text output or vibrant graphics, Arduino LCD displays offer versatile solutions for hobbyists and engineers alike.
We evaluated ten top-rated modules based on clarity, compatibility, and ease of use. Each product was assessed for interface type, resolution, and compatibility with common development boards like Arduino and Raspberry Pi.
Every selection below highlights key features and real-world applications to help you decide. Keep in mind that availability and costs may fluctuate over time, so check current listings before purchasing your next component.
4.6Editor score

4.5Editor score

4.7Editor score
This table provides a side-by-side comparison of the ten featured modules. Review each product's interface, resolution, and unique strengths to find the perfect match for your specific development needs.




This three-pack module offers a reliable entry point for character output projects. With a high user rating and straightforward I2C interface, it simplifies connections significantly.
We may earn a commission when you buy through this link, at no additional cost to you.
The built-in potentiometer allows you to fine-tune the blue backlight brightness for different lighting conditions. Its compatibility with boards like Arduino and Raspberry Pi makes it versatile for various prototypes.
While it lacks advanced graphical features, the trade-off is worth the simplicity for text-based data. The stable integration circuit ensures fewer communication errors during serial transmission.
Buy this if you need clear text output without complex wiring. It is ideal for beginners learning how to interface displays with microcontrollers effectively.
Using the I2C protocol reduces pin usage to just four wires, leaving more GPIO available for sensors.
The onboard potentiometer gives you direct control over display brightness to match your environment.
We may earn a commission when you buy through this link, at no additional cost to you.
This package delivers three self-luminous OLED modules perfect for small dashboards. The fixed yellow and blue zones help organize information clearly without complex color coding.
We may earn a commission when you buy through this link, at no additional cost to you.
Each module uses SSD1306 drivers compatible with standard I2C libraries. Their compact size leaves plenty of room on a breadboard for additional components.
The lack of a backlight reduces power consumption significantly. However, note that colors are fixed by the panel hardware and not programmable.
Choose this for cost-effective visual feedback in multiple prototypes. It is excellent for status indicators or simple menus in portable electronics.
Since OLED pixels generate their own light, you save energy compared to traditional backlight displays.
Getting three modules in one pack means you can start three separate builds without reordering parts.
We may earn a commission when you buy through this link, at no additional cost to you.
This TFT shield brings vibrant graphics and touch control to Arduino projects. Its 320×240 resolution allows for detailed icons and menus.
We may earn a commission when you buy through this link, at no additional cost to you.
The parallel interface supports fast screen updates for smoother animations. An SD card slot lets you store assets directly on the display module.
Note that resistive touch requires pressure via the stylus, which might feel less natural than capacitive options. Also, the parallel interface uses more pins than I2C.
Select this for projects needing significant interactivity. It works well for control panels or handheld game devices.
Store images or fonts on the SD card to reduce load on your microcontroller's memory.
The parallel bus ensures fast data transfer for dynamic visual updates.
We may earn a commission when you buy through this link, at no additional cost to you.
GeeekPi offers a two-pack of reliable character displays with I2C support. This reduces pin occupation significantly compared to parallel interfaces.
We may earn a commission when you buy through this link, at no additional cost to you.
Each module features a blue backlight with a potentiometer for easy adjustment. Its standard dimensions fit well on most breadboards and prototype shields.
The modules are straightforward to use with standard libraries. However, they are limited to text output and do not support graphics.
This is a practical choice for IoT devices needing text feedback. Buy this if you need multiple displays for a single system.
Using I2C keeps your project tidy by reducing the number of wires running between components.
Works seamlessly with common boards like Arduino Uno, Raspberry Pi, and STM32 variants.
We may earn a commission when you buy through this link, at no additional cost to you.
Freenove focuses on simplicity and stability for new makers. The I2C module reduces errors during communication setup.
We may earn a commission when you buy through this link, at no additional cost to you.
Online resources offer example projects for popular controllers. The new model integrates conversion circuits for more stable operation.
You get two units which is useful for testing. Note that there are no paper tutorials included, so digital skills are helpful.
Pick this if you value online support and stability. It is a solid entry-level display for learning text output.
Integrated conversion circuits minimize signal interference and improve display reliability.
Access detailed guides and code examples directly from the product support website.
We may earn a commission when you buy through this link, at no additional cost to you.
SunFounder provides a classic LCD1602 module with straightforward documentation. It supports the IIC protocol and includes a dedicated library for quick start.
We may earn a commission when you buy through this link, at no additional cost to you.
The module uses just four wires for connection. A potentiometer allows you to adjust contrast and brightness for clarity.
It is recommended for users aged 14 and older due to soldering or fine wire handling. The design is reliable for basic text needs.
This fits well in school projects or home automation. Choose it for its simplicity and supported software stack.
Dedicated libraries let you call functions directly to write text without complex low-level code.
Only four pins are required for data and power, saving space on crowded boards.
We may earn a commission when you buy through this link, at no additional cost to you.
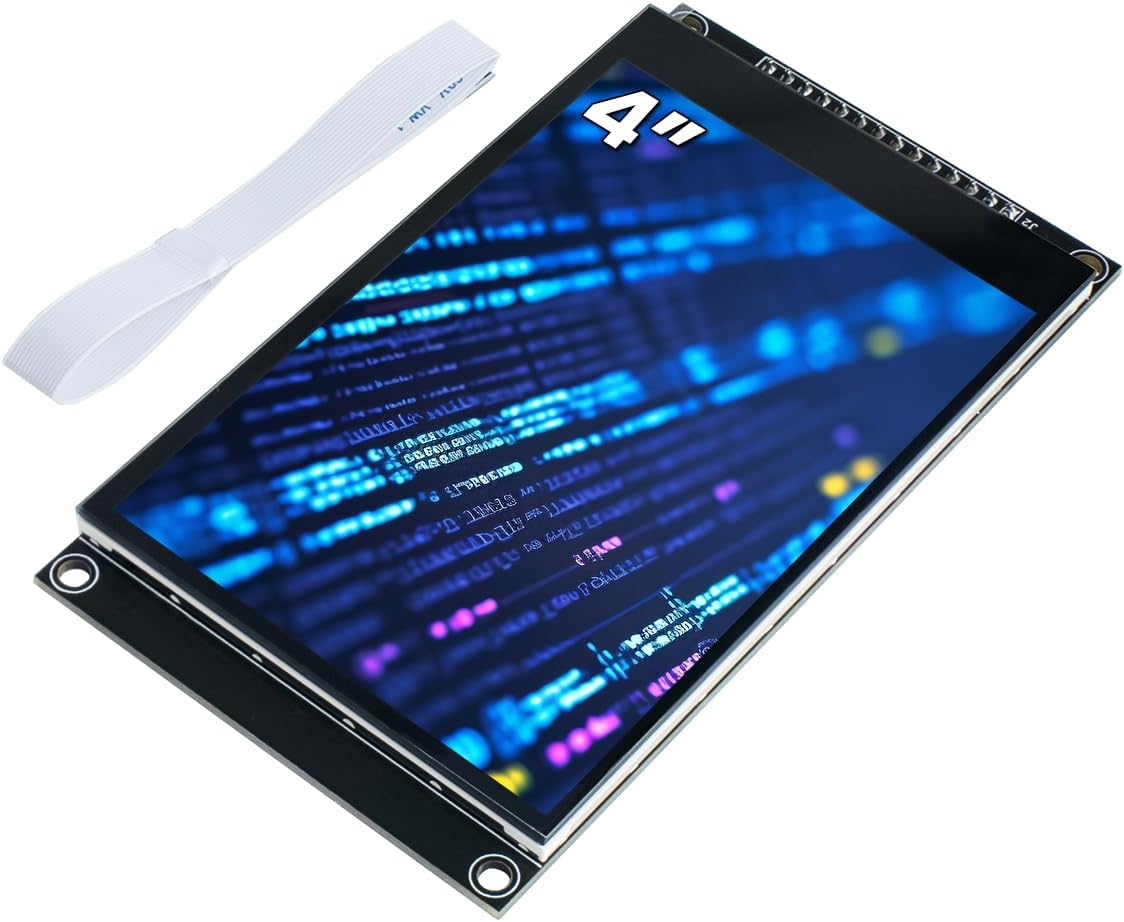
This module offers a 4.0 inch screen with capacitive touch for a modern feel. The 320×480 resolution supports detailed UI elements.
We may earn a commission when you buy through this link, at no additional cost to you.
It uses SPI serial bus to save IO pins. An onboard TF card slot expands storage options for images and data.
While the touch is convenient, user feedback is mixed regarding driver stability. Ensure your MCU supports the required voltage conversion.
Consider this for projects needing large touch interaction. It is suitable for dashboards or smart home interfaces.
Capacitive touch allows for quick taps without the pressure needed by resistive screens.
Expand your project's memory with a micro TF card for storing large files.
We may earn a commission when you buy through this link, at no additional cost to you.
This five-pack includes both blue and yellow OLED modules. The self-luminous pixels provide bright output even in dark rooms.
We may earn a commission when you buy through this link, at no additional cost to you.
Communication relies on I2C, saving two ports per unit. You must generate fonts using software since none are embedded in the controller.
The low power consumption makes these ideal for battery projects. Having five modules allows you to build a large sensor array.
Buy this for high-visibility feedback with minimal power draw. It is great for portable devices needing clear text.
Use font software to create unique text styles that match your project branding.
The OLED panel offers angles over 160 degrees so text stays readable from the side.
We may earn a commission when you buy through this link, at no additional cost to you.
This 2-inch IPS display delivers sharp visuals in a small size. The 240×320 resolution and 262K colors ensure clear graphics.
We may earn a commission when you buy through this link, at no additional cost to you.
SPI interface reduces GPIO usage compared to parallel. Ensure you match logic voltage levels to avoid compatibility issues.
The module is compact, fitting easily into handheld devices. Backlight is LED-based for consistent brightness.
Ideal for wearable tech or small dashboards. Choose this for high-quality visuals in limited space.
262K color support lets you create visually engaging interfaces with gradients.
The small 30x40mm screen saves space for other components in portable builds.
We may earn a commission when you buy through this link, at no additional cost to you.
This two-pack combines premium IPS quality with reliable SPI communication. The ST7789V driver supports crisp visuals for complex UIs.
We may earn a commission when you buy through this link, at no additional cost to you.
Bright output is visible even in dim lighting. Wide viewing angles ensure content remains readable from any position.
Logic level support for both 3.3V and 5V simplifies integration with modern boards. Clear pin labels reduce wiring confusion.
Choose this for high-end portable projects. It delivers professional-grade visuals for dashboards and robotics.
The ST7789V controller offers reliable performance and supports common graphics libraries.
Support for multiple voltage levels ensures compatibility across different MCU families.
We may earn a commission when you buy through this link, at no additional cost to you.
Selecting the right display depends on your specific project needs. Consider the following factors to narrow down your options effectively.
I2C interfaces are ideal for saving GPIO pins, requiring only four wires. SPI offers faster data transfer but uses more pins. Parallel is best for high refresh rates but is complex.
Choose I2C for simplicity or SPI for speed.
LCD requires a backlight which consumes more power. OLED is self-luminous with high contrast but may suffer from burn-in. TFT provides vibrant colors suitable for graphics.
Use OLED for low power or TFT for color.
Character displays like 1602 are limited to text. Pixel displays like 128×64 or 240×320 allow icons and images. Higher resolution means more processing power needed.
Match resolution to your content requirements.
Touch screens add interactivity. Capacitive is more responsive than resistive. Resistive requires a stylus but is cheaper. Consider if user input is necessary.
Select touch only if interactivity is critical.
Ensure the module supports your MCU's voltage level. Most work with 3.3V or 5V but logic converters may be needed. Check library availability for your platform.
Verify voltage and library support before buying.
Battery projects need low power. OLED draws less than LCD with backlight. SPI consumes more than I2C. Check typical current draw in the datasheet.
Prioritize low draw for portable devices.
Physical dimensions matter for compact projects. 2 inch screens fit in handhelds while 4 inch are better for desktop units. Ensure it fits your enclosure.
Measure your space before selecting size.
Well-documented modules save time. Look for example code and clear pinouts. Online support helps if drivers are needed. Avoid obscure modules with no community help.
Choose brands with clear documentation.
Install the appropriate library for your specific display type. For I2C OLED modules use the Adafruit SSD1306 library. For character LCDs use LiquidCrystal_I2C.
Connect power and ground first then data lines. Use the correct voltage to avoid damaging the panel. Check connections with a multimeter if needed.
Avoid leaving static images on OLEDs to prevent burn-in. Keep the module clean from dust and moisture. Store in a dry place when not in use.
1602 displays show only text characters and require a backlight. OLED screens show graphics and are self-luminous with higher contrast. OLED uses less power but may burn in over time.
I2C saves GPIO pins by using only four wires. Parallel uses more pins for faster data. Choose I2C for simple projects or parallel for high speed.
Use a level shifter if your MCU and display operate at different voltages. Many boards support both 3.3V and 5V directly. Check datasheet specs before wiring.
Yes if they have different addresses or use a multiplexer. I2C allows many devices on the same bus. Ensure addresses do not overlap to avoid conflicts.
Open the IDE library manager and search for the driver name. Install and include the library in your code. Restart the IDE to ensure proper loading.
Burn-in occurs when static pixels stay lit too long causing fading. Avoid leaving static elements on screen. Rotate images to prevent uneven wear.
The Hosyond 3pcs I2C IIC 1602 LCD Display Module offers excellent value for text projects. The ELEGOO OLED pack is perfect for cost-effective visual feedback. The AITRIP TFT provides premium quality for graphics.
Prioritize interface simplicity and power needs for your build. A clear display enhances usability and adds professional polish to prototypes. Match resolution and size to your case requirements.
Check current stock before ordering as supplies may vary. Select the module that balances performance and budget for your project needs. Happy building with your new display.